Sequenze di acquisizione personalizzate
Cos'è una sequenza di acquisizione?
L'AOI non fotografa l'intera scheda in un solo scatto. La telecamera si sposta sull'area di ispezione e acquisisce una griglia di fotografie, che il software unisce poi in un'unica immagine. Questa griglia è ciò che chiamiamo sequenza.
Il software include un set di sequenze predefinite che coprono le dimensioni di scheda più comuni:
| Sequenza | Griglia | Acquisizioni |
|---|---|---|
| SMALL | 1x1 | 1 |
| MEDIUM | 1x2 | 2 |
| LARGE | 2x2 | 4 |
| WIDE | 3x2 | 6 |
| EXTRA LARGE | 3x3 | 9 |
| MAXIMUM | 3x4 | 12 |
Una sequenza personalizzata consente di definire una griglia propria quando nessuna di quelle predefinite si adatta correttamente alla scheda.
Quando ne avete bisogno?
Creare una sequenza personalizzata vale la pena quando:
- La scheda ha una forma che non corrisponde a nessuna delle griglie predefinite, tipicamente pannelli lunghi e stretti.
- La sequenza predefinita più piccola che copre la scheda copre anche una vasta area vuota intorno ad essa, per cui l'AOI fotografa spazio dove non c'è scheda.
- Ispezionate ripetutamente lo stesso prodotto e volete che la griglia di acquisizione vi si adatti nel modo più preciso possibile.
Ogni acquisizione della griglia viene elaborata separatamente e la finestra di anteprima dal vivo mostra quante inferenze esegue la sequenza selezionata. Una griglia adattata alla scheda evita acquisizioni inutili.
Dove trovarla
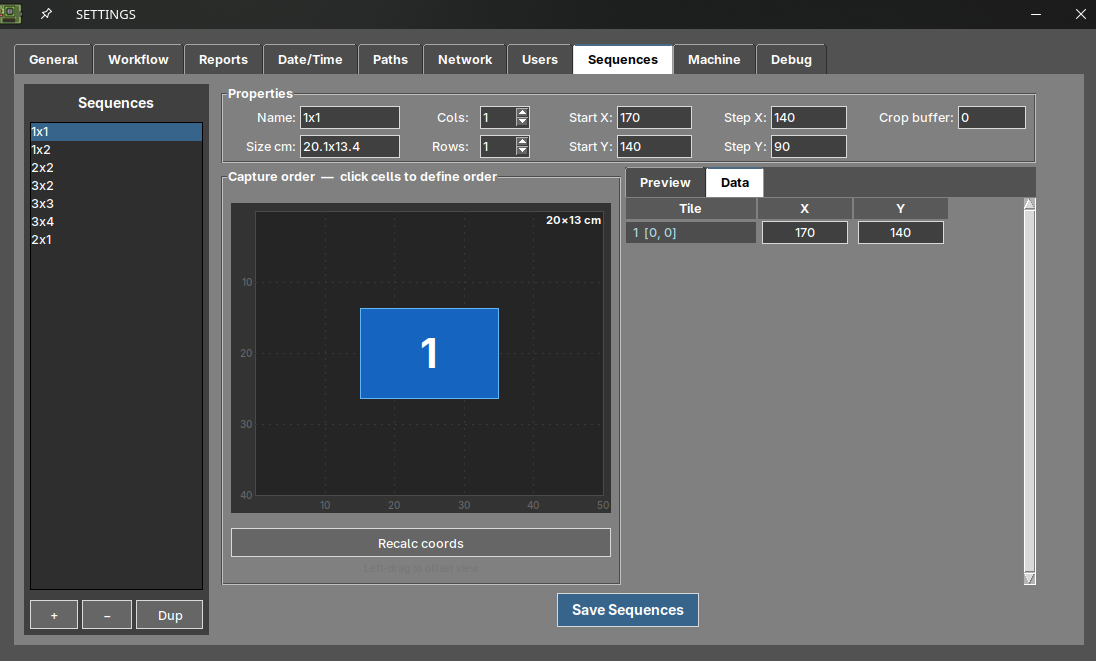
Aprite il menu Impostazioni e andate alla scheda Sequences.
Nota
Questa scheda è disponibile solo per gli utenti con il ruolo admin.
I parametri
| Campo | Descrizione |
|---|---|
| Name | Nome della sequenza. È il nome che verrà poi mostrato nella finestra di anteprima dal vivo. |
| Size cm | Area di scheda coperta dalla sequenza. Viene calcolata automaticamente a partire dagli altri valori, così potete usarla per verificare che la griglia copra effettivamente la scheda. |
| Cols / Rows | Numero di colonne e righe della griglia, da 1 a 8. |
| Start X / Start Y | Posizione della prima acquisizione, espressa in passi motore della piattaforma. |
| Step X / Step Y | Distanza percorsa dalla telecamera tra un'acquisizione e la successiva, anch'essa in passi motore. |
| Crop buffer | Sovrapposizione tra acquisizioni adiacenti, in pixel. |
Informazioni sul crop buffer
Le acquisizioni adiacenti devono sovrapporsi leggermente affinché il software possa unirle. Se la sovrapposizione è troppo piccola, le giunzioni tra le acquisizioni possono diventare visibili; se è troppo grande, si fotografa due volte la stessa area senza alcun vantaggio.
Creare una sequenza personalizzata
1. Aggiungere la sequenza
Premete il pulsante + sotto l'elenco delle sequenze per crearne una nuova.
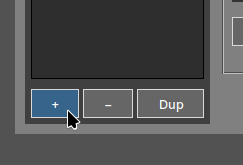
Il pulsante − elimina la sequenza selezionata nell'elenco e Dup la duplica. Duplicare una sequenza predefinita vicina a ciò di cui avete bisogno è di solito più veloce che partire da zero.
2. Nominarla e impostare la griglia
Assegnate alla sequenza un nome descrittivo — è quello che cercherete in seguito nell'anteprima dal vivo — e impostate il numero di colonne e righe richieste dalla scheda.

Il campo Size cm si aggiorna automaticamente man mano che modificate i valori, così potete verificare se l'area risultante copre la scheda.
3. Posizionare la griglia e definire l'ordine di acquisizione
Impostate Start X e Start Y per posizionare la prima acquisizione, e Step X e Step Y per stabilire quanto si sposta la telecamera tra un'acquisizione e l'altra. Premete quindi Recalc coords per ricalcolare la posizione di ogni acquisizione a partire da questi valori.
Il canvas mostra la griglia risultante in scala. Fate clic sulle celle nell'ordine in cui volete che vengano fotografate per definire l'ordine di acquisizione.
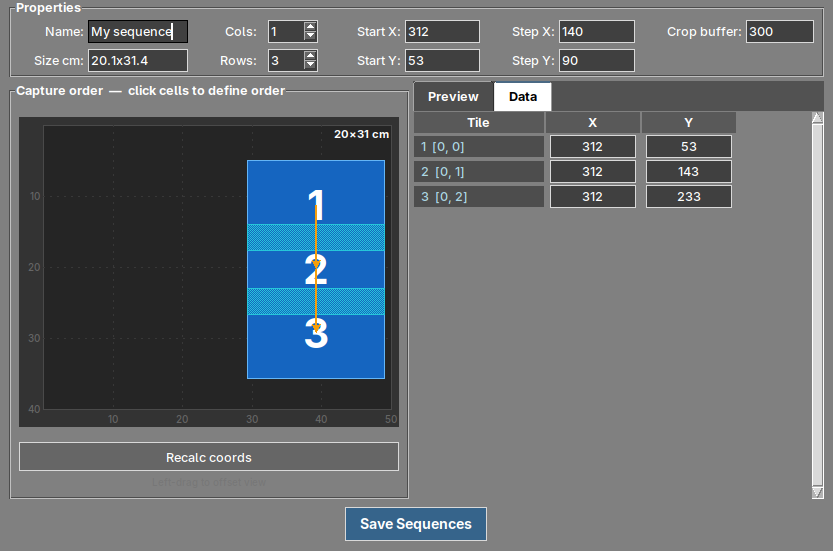
Nell'esempio precedente, un pannello alto e stretto viene coperto con 1 colonna e 3 righe. La prima acquisizione si trova in X 312, Y 53, e con uno Step Y di 90 le acquisizioni successive cadono in Y 143 e Y 233. La scheda Data elenca le coordinate di ogni acquisizione e permette di modificarle una per una se è necessario affinare una posizione specifica.
Potete anche fare clic con il tasto sinistro e trascinare sul canvas per spostare la vista, e fare clic con il tasto destro e trascinare per regolare visivamente la zona di sovrapposizione.
4. Verificare il risultato
Selezionate un'acquisizione e aprite la scheda Preview per vedere l'immagine dal vivo della telecamera in quella posizione esatta. È il modo più rapido per confermare che la griglia copra davvero la scheda prima di salvare.
Nota
L'anteprima richiede che la piattaforma sia collegata, poiché la telecamera si sposta fisicamente nella posizione selezionata.
5. Salvare
Premete Save Sequences. La configurazione viene salvata nel file sequences.json della vostra unità.
Utilizzare la vostra sequenza
Una volta salvata, la vostra sequenza appare come opzione CUSTOM nella finestra di anteprima dal vivo, sia quando si acquisisce un'immagine di RIFERIMENTO sia quando si avvia un'ispezione.
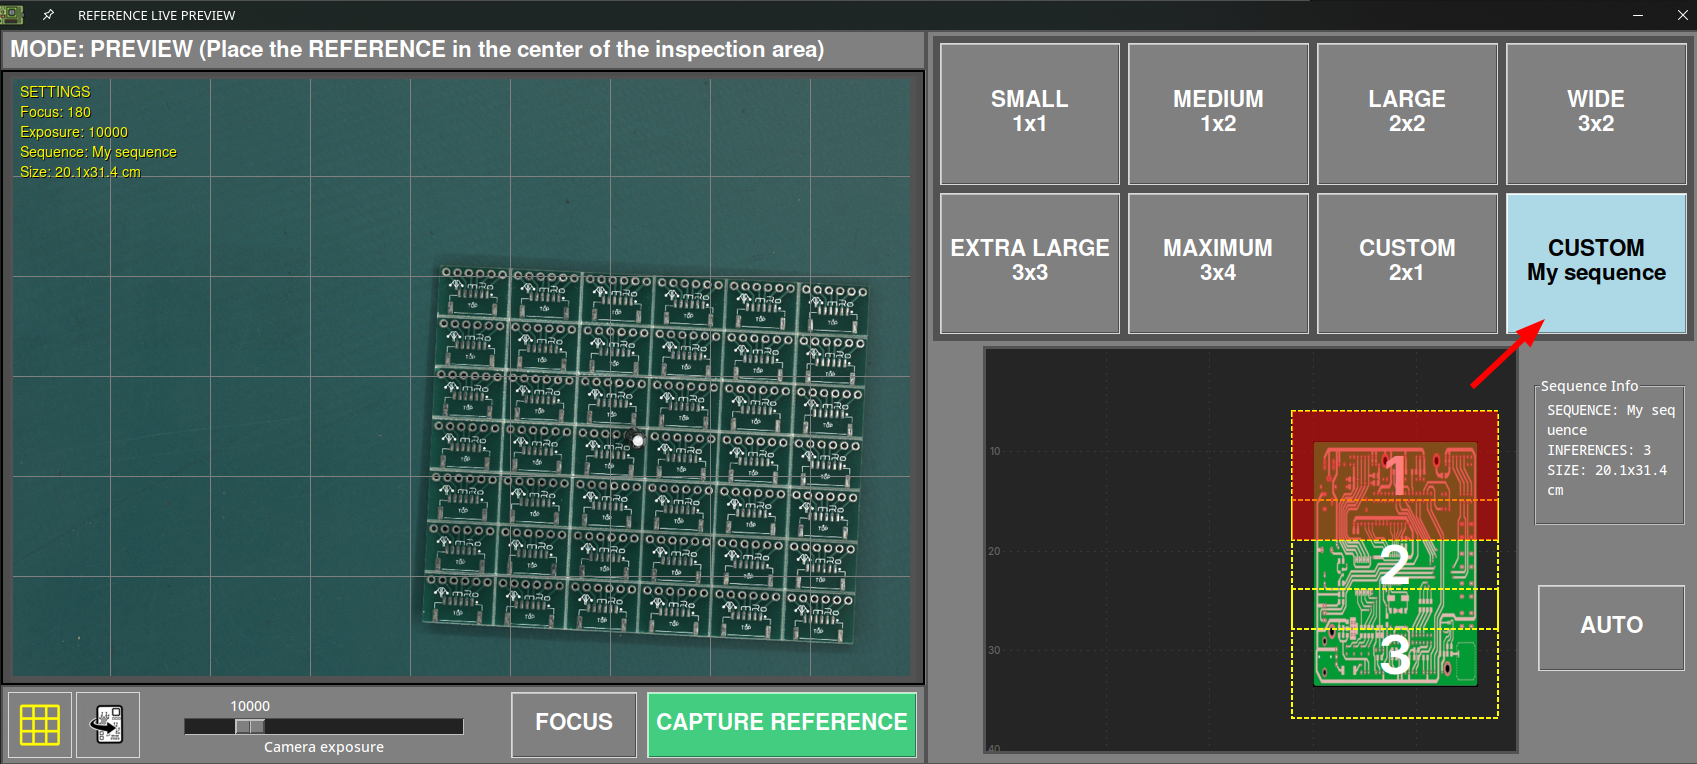
Selezionandola viene mostrato il pannello Sequence Info con il nome della sequenza, il numero di inferenze che esegue e l'area che copre.